
Diamond painting is a relaxing and surprisingly addictive craft that blends elements of cross-stitch and paint by numbers, but uses sparkling resin “diamonds” instead of thread or paint. As someone who’s spent plenty of evenings unwinding with a diamond painting kit, I’ve found it to be an awesome way to de-stress and end up with some seriously awesome sparkling art.
Getting the Hang of Diamond Painting: What Is It?
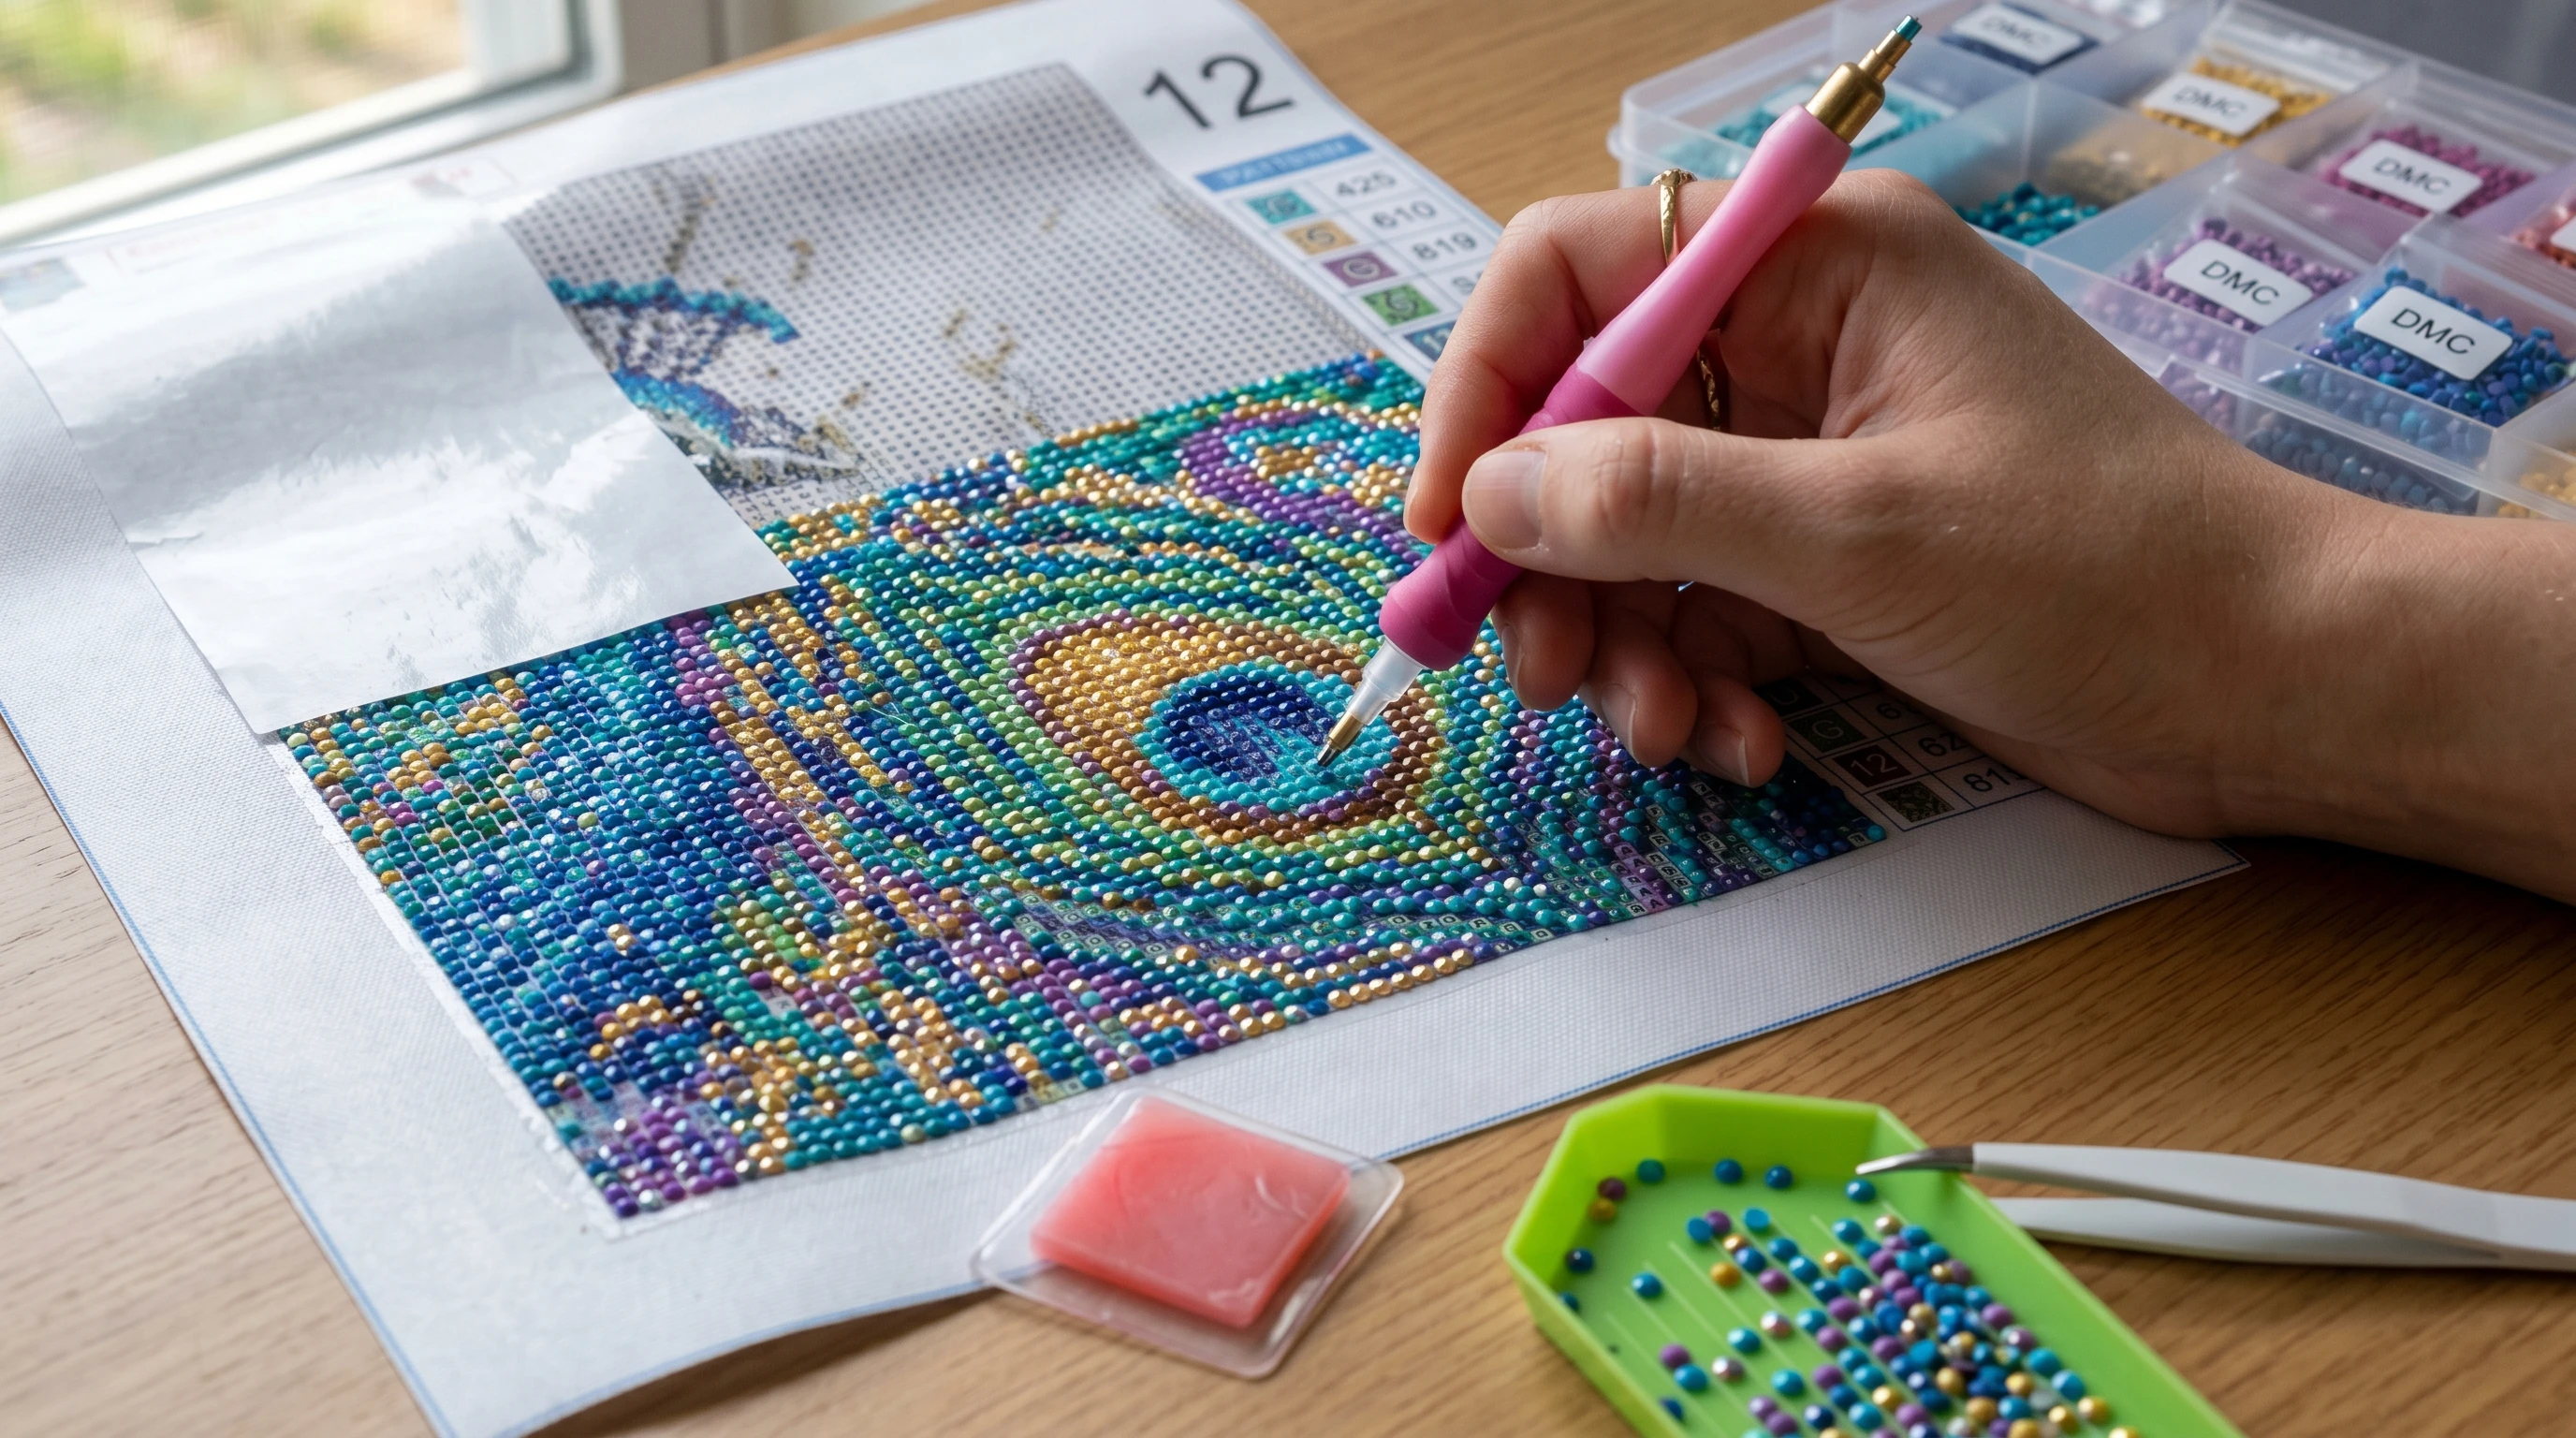
Diamond painting is a craft where you stick tiny resin rhinestones, called “drills,” onto a sticky canvas, following a coded pattern. It is very similar to a paint by number canvas, except you’re placing shimmery drills( otherwise known as diamond dotz) instead of dipping a brush into paint. The result looks like a sparkling mosaic artwork. Each kit usually comes with a printed canvas, color-coded diamond drills, a diamond pen (a little tool for picking up the drills), a wax pad for extra stickiness, and a tray to organize the drills. There are also plenty of YouTube videos available to watch to help you get started as well.
Unlike complicated art techniques, diamond painting doesn’t require experience, just a bit of patience and some free time. Even beginners find it easy to jump in and see results quickly. It’s also a fantastic way to slow down and focus, which adds to its appeal in our busy world.
Everything That Comes in a Diamond Painting Kit
If you’re eyeing your first kit and aren’t sure what you’ll get, here’s what you can expect inside most boxes:
- Adhesive Canvas: Pre-printed with a pattern and already sticky; the symbols guide you on where each color drill goes. The canvas comes with a protective sheet covering it. Make sure that you do not peel it off and throw it away because it protects the stickiness on the canvas.
- Diamond Drills: Small faceted sparkling beads, usually made of resin, in bags sorted by color. They come in round or square shapes. Both work the same way, but square drills give more of a seamless look.
- Diamond Pen: A pen tool that helps you pick up and place the drills onto the canvas.
- Tray: Used to organize and shake out your drills, which makes picking them up easier.
- Wax Pad: Adds stickiness to the pen tip so you can easily pick up the drills.
The basics above are really all you need to finish your first project. You may also want to step up your toolkit with specialized storage boxes, an electric light pad, a magnifying glass, or ergonomic pens to make the process even smoother and more comfortable over time.
How the Process Works: Your First Diamond Painting Project
There’s no need to feel intimidated if you haven’t tried diamond painting. Here’s a quick walkthrough of what the hobby actually looks like in practice:
- Unpack and Unroll: Take everything out of the kit and gently flatten your canvas. You can lie heavy books on the corners if it curls.
- Find Your Starting Spot: Some people start from the top left corner and work across, while others prefer the bottom. Totally up to you!
- Check the Chart: The canvas symbols match the drill colors. Pour some drills into the tray and give it a gentle shake; this will flip most of them right side up.
- Stick, Place, and Repeat: Dip your pen in the wax, then use it to pick up a drill and place it on the canvas over the matching symbol. Keep going, color by color, until you fill the entire design.
The sticky surface on the canvas keeps the beads in place, so you don’t need to add glue. Most canvases have a clear plastic film protecting the adhesive. Just peel back a small bit at a time to keep dust away and avoid losing stickiness. Finishing your first painting feels ridiculously satisfying, especially when you see all those sparkles come together. As you work, you’ll develop a rhythm that makes the process feel soothing and enjoyable, transforming a blank canvas into a vibrant piece of art.
What to Know Before Starting: Tips for New Diamond Painters
Picking out your first kit can be a bit overwhelming with the sheer number of designs and sizes out there. Here are a few pointers to help you decide:
- Size Matters: Bigger canvases have more detail and look sharper, but they will take much longer. A small kit (around 20×20 or 30×40 cm) is plenty for your first try and lets you finish quickly to see if you like the hobby.
- Drill Shape: Round drills are easy to line up and work well for new painters. Square drills fit together more snugly and give a fuller mosaic but need more precision. If you’re after a challenge, experiment with both to find what you prefer.
- Light Is Everything: Good lighting cuts down on eye strain, especially if you’re working at night. An electric light pad (a common diamond painting accessory) placed underneath the canvas makes symbols much easier to see, keeping mistakes at bay. You could also try moving your canvas near a window during the day for natural light, or use a desk lamp for evening sessions. Also, If you have less than perfect eye sight, a wearable magnifying glass is highly recommended to help you to see the fine print on the canvas much easier.
- Get Organized: Highly recommended: having little trays, containers, or zip baggies for different color drills saves time and keeps things tidy. Some crafters repurpose small food containers or use weekly pill organizers to keep their drills sorted and ready to use. It is important to mark these containers with the corresponding code for each drill color from the chart that is shown on the canvas.
Tackling Common Diamond Painting Frustrations
- Static Cling: Drills sometimes stick to each other or to the tray. Rubbing a dryer sheet inside the zip bag or tray helps ease up static and makes handling them easier.
- Mismatched Symbols: If you place the wrong color, don’t panic. Use a pair of tweezers to gently pry off the beads and drop the right ones in. Extra patience here goes a long way.
- Loss of Canvas Stickiness: Keep the protective sheet that comes on the canvas in your kit, on the canvas as you work; and also for keeping the dust off when you are not working on your project. Dust will decrease the stickiness of the canvas quickly. Never throw the protective sheet away until you have completed your project.
Diamond Painting Tricks:
Work in Small Sections: Peel back only the part of the protective sheet where you are working to keep the canvas sticky and dust-free. This also prevents any unwanted fuzz or pet hair from sticking to your artwork.
Roll It Out: After finishing a section or the whole piece, gently press the drills down with your thumb, or use a rolling tool (a common diamond painting accessory) designed for this purpose. This ensures that the drills stay stuck in place on the canvas.
Framing: You can frame diamond paintings just like a puzzle or print. Use a standard photo frame without glass if you want the sparkle to pop. Some people use foam boards or adhesive stretching to mount their finished work, too.
Save the Spares: Keep leftover drills sorted by color. They’re super handy in case you suddenly find yourself short on a particular color of drill in future diamond art projects.
Why People Love Diamond Painting
So what gets people so hooked? For a start, diamond painting is a great way to unwind and refocus your mind. Also, watching a piece of diamond art reveal itself row by row delivers a sense of progress that you can actually see and get exited about. Plus, it’s accessible to just about anyone. No artistic experience is needed.
Finished projects make great gifts, room decor, or conversation starters. There are thousands of designs out there, from sunsets and cityscapes to beloved cartoon characters or abstract patterns.
Frequently Asked Questions
Here are some common questions about diamond painting:
How long does it take to finish a diamond painting?
It depends on the size of your project, and how much time you have available to work on it. Small kits might take a few evenings, while larger ones can span weeks. Some people like to dedicate 30 minutes of time here and there, others binge for hours. The beauty is in setting your own pace and enjoying the ride.
What do I do if I run out of a color?
If you’re short a few drills, reach out to the seller; most will send replacements for free or a small fee. Keeping leftover beads from other kits is also super useful for mixing and matching when you need a quick fix.
Can I make custom diamond paintings?
Absolutely. Plenty of online shops will turn your photos into diamond painting kits, so you can create a sparkling portrait of a pet, loved one, or favorite memory. It adds a personal touch and lets your creative side shine.
How should I clean my finished painting?
A gentle wipe with a dry cloth or a soft brush clears away dust. Avoid using water or spray cleaners, as moisture can mess with the adhesive and loosen the drills.
Wrapping Up and Finding Your Creative Flow
Diamond painting doesn’t need special skills, and this craft is a satisfying way to spend some free time. I always look forward to picking out my next kit and seeing how a pile of tiny diamonds turns into shimmer art for my wall. Plus, the relaxing, repetitive movement gives my mind a real break from the bustle of daily life; it’s a craft that’s easy to stick with.
If you’re curious about getting started, plenty of reputable craft shops and online platforms offer quality kits in every theme you can think of. Give it a try, and you might find it quickly becomes your new favorite chill-out hobby. Happy diamond painting!